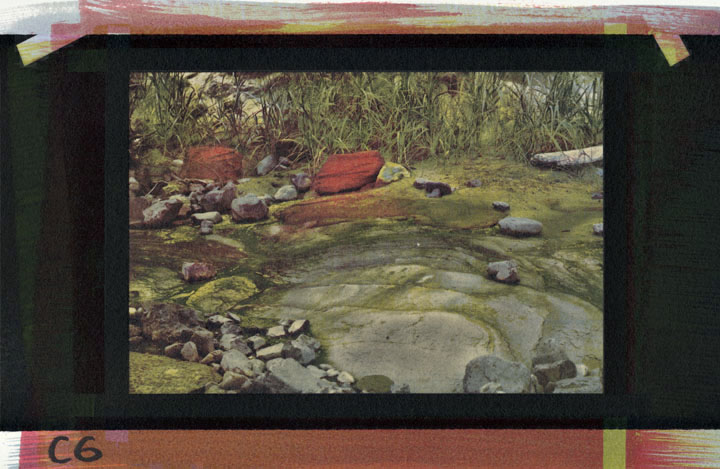
Seal Rock Seep #3
|
|
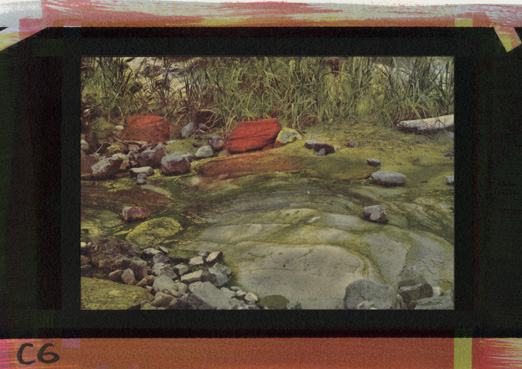
This image started life in a Pentax K10 digital camera at factory default settings, shooting RAW. Digital file > digital b&w negative and digital color negatives > handcrafted silver gelatin emulsion > three-color gum printing. ( Note: I am working out negative manipulation guidelines. When I feel comfortable that these are not totally bogus, I will amend this page to include that information. Currently, I am employing standard gum printing techniques of pigment v. sensitizer concentrations and exposure timing, along with selective pigment removal during development. Which of the time-honored gum techniques will remain part of my personal work flow is yet to be determined. dwr: 9/10/07)
As I have noted in pervious posts, the quality of the print doesn't quite come through the scanning process. The tooth of the paper, covered with gelatin and gum is beautifully smooth and reflective. The scan looks much more matt and rough than the original.
9/24/07
The goal of this set was to try to get the negatives as close as possible to 'right'. I selectively burned and dodged the individual layers to reflect the selective post-development pigment removal necessary on the SRS#2 set. I enjoy playing with my prints, so I do not see hands-off as a holy grail goal, but a negative set that prints reasonably consistently, without a lot of manipulation, would be useful for printing uniform editions.
In addition to the contrast control, I shrank each subsequent negative by 0.1 or 0.2 mm to perfect registration on paper that shrinks just a tad with each printing step. Perfect registration makes a big difference in the appearance of the final print. From the last set, I also made the blue just a bit more concentrated.
The new negatives worked great. On the first three layers
(Highlights, Blue, and Yellow) I did very little pigment removal. The
prints were looking so much like the last set that I decided to try a
different Red mix - Quina Red and Quina Rose, 1:1. Whoa! I
wouldn't have believed such a difference. Much stronger and probably
held its own better with Yellow, but over Blue it took on the color of dried
blood. The final print in this set required extensive selective pigment
removal.
 |
 |
 |
|||||||||
|
|
|
 |
 |
||||||
|
|
| Silver Gum Gallery | Next |