Glass Negatives
| Previous | Emulsion Home | Next |
|
| This section is new on two levels. First, it’s an initial go at glass negative emulsions. Second, and perhaps more important (at least to me), it is a preview of a new website/forum dedicated to handcrafted silver gelatin emulsion making that I will start publishing on February 1, 2008. To learn more about The Light Farm, please go here. |
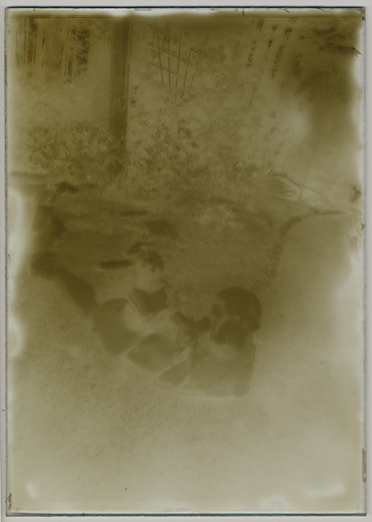 |
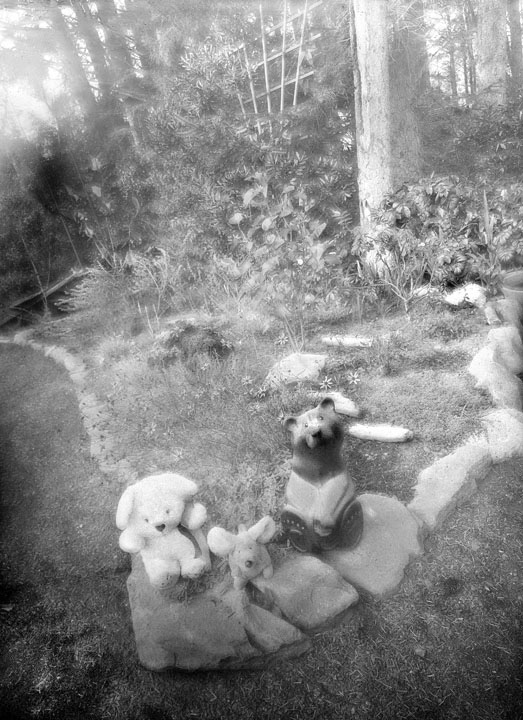
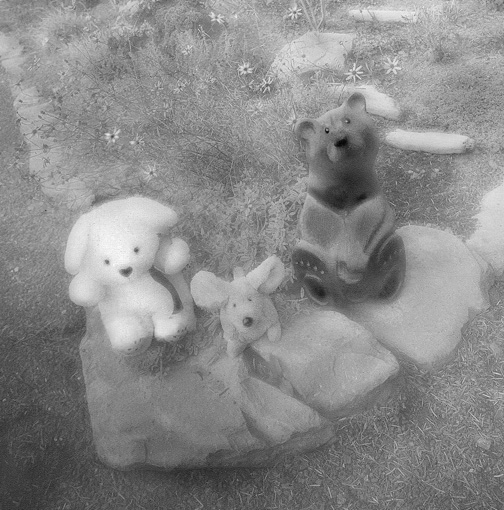
The Pyro-Developed Glass Plate Negative: Camera: Wisner 5x7. Lens: 90mm. Exposure: 30 seconds at f/16. Developed 15 minutes in B&S PMK Pyro Developer w/ Kodalk pre-soak , water stop bath and plain hypo fix. The light was low and going fast as a storm rolled in. It started raining a few minutes after I exposed this negative. Ideally, I would have made a second exposure at 1 minute, but the magic of pyro has rescued many a thin negative. Given the light level, aperture, and bellows extension factor, I place the ISO at approximately 12. The coating on this plate was a little scant. There is complete coverage of the glass, plus enough to form a frill-stopping band around the edge, but emulsion wants to thin back from the edge of a plate. I ended up with a 4.13 x 6.24 inch area of good, printable negative. (I've written more about coating in the recipe for this emulsion that follows below.) With this developer there was no frilling, bubbles or emulsion loosening from the glass. In fact, the discard plates are a dog to clean for re-use. |
|
|
|||||||||
|
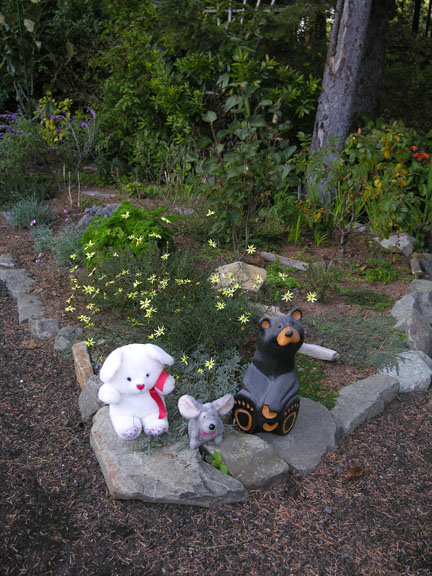
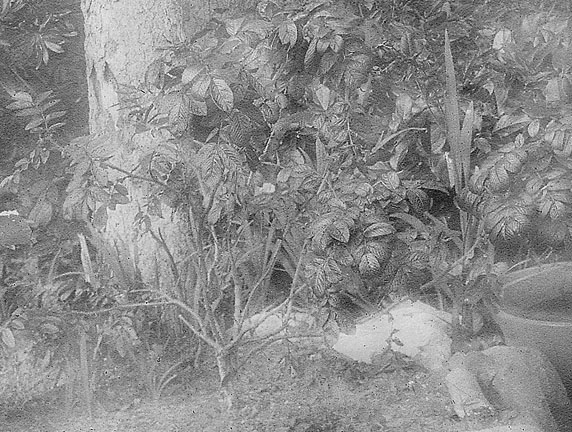
A 1-1/2 inch high section of the above image, upsized without manipulation. |
|
The recipe for this emulsion is the first entry in The Light Farm's cooperative learning experiment. I have taken what is arguably the most well-known of the 'historic' emulsion formulas and modified it for our use. The recipe makes 200 ml (give or take) of emulsion, enough to coat a dozen or more 5x7-inch glass plates. It is a starting point - a slow and low contrast emulsion, but simple and almost foolproof with very little risk of fog. I hope that it encourages people to take the plunge into emulsion making. There is wide latitude for experimentation and improvements, wherein lies the philosophy of The Light Farm. People who try this recipe, with contribution to the body of emulsion knowledge in mind, will take careful notes of their procedures. (For example: increasing the digestion time will increase the speed, but runs the risk of introducing fog. A curve of time/sensitivity will be of enormous use.) There are additions to try, and coating procedures to perfect. And always, the wealth of developers to play with. Question: Will the emulsion frill in a non-pyro developer? Beyond making the negative, what are the best printing techniques? The Light Farm will have a gallery/article section that each member can contribute to. There will be a discussion forum, but the participants must be working the emulsions and asking questions and making comments based on personal, hands-on experience. Although I am currently working on an additional 'kick-start' recipe,
I won't be doing more work with this emulsion. Since I love the
process of research and personal discovery I have to believe that is
also true of others. We are not photographers who are willing to
settle for off-the-shelf - especially when the shelf has less and less
on it.
|
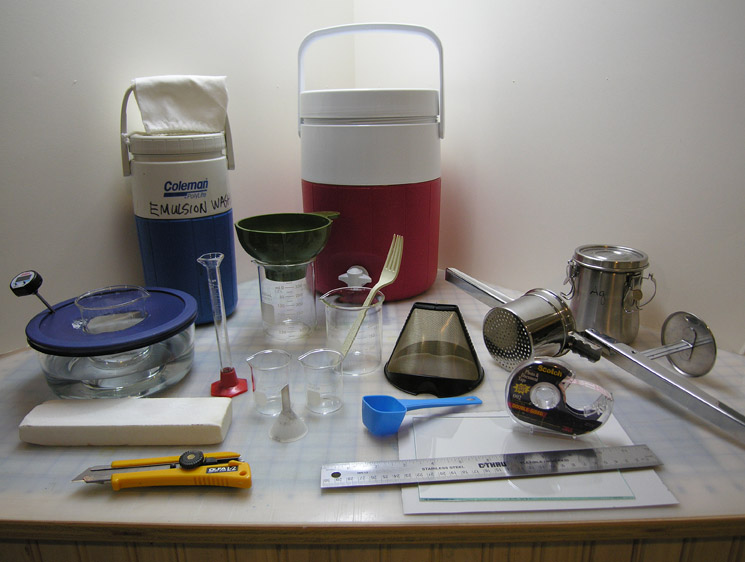 |
All of the tools and materials needed for this recipe are available from a good grocery/household goods store, the Photographers' Formulary, and Daniel Smith Art Supplies (with the exception of the magnetic hot plate). From upper left: 1/2 gallon Coleman drink cooler and a jelly straining bag for emulsion washing, 2 gallon Coleman for holding ice water for washing, Daniel Smith stainless steel field brush washer for light-tight emulsion refrigeration, stainless steel potato ricer for noodling emulsion, gold mesh coffee filter, assorted beakers and a canning funnel, 10 ml graduated cylinder, water bath and thermometer, sanding brick to smooth glass plate edges, assorted scoops, small (0.5 cm) funnel for silver additions, double back tape, mylar sheets, straight edge, and x-acto knife. Also needed are the various tools common to a good home darkroom,
including an accurate scale. In addition, a basic magnetic hot plate is
very handy. I got mine on ebay for $149. A thermostat
probe model is not necessary. |
The Light Farm Glass Plate Negative Emulsion #1Modified from Photographic Emulsion Technique, 2nd Ed.T. Thorne Baker, 1948, page 82. |
|||||||||||||||||||||||||||||||||
|
First Session: For Approx. 200 ml emulsion: Preheat waterbath on magnetic hot plate to 43C. Weigh out ingredients.
In a beaker (150 to 250 ml size) or a container that is easy to scrape
out, swell gelatin at least 30 minutes at room temp.
In 250 ml beaker, swell gelatin 30 min. Add:
Melt to 43C in waterbath, with occasional, gentle stirring.
Measure 5 ml ammonia into a 10 ml graduated cylinder. Have a dropper bottle of ammonia ready and waiting. In a small beaker dissolve the silver in the water (by stirring with the handle of a plastic spoon). Slowly, with stirring, add 5 ml ammonia. (Excellent ventilation is a very good thing here.) With the first few drops of ammonia, the solution will turn a muddy black from the precipitate that is formed. After the first 5 ml has been added, starting with two drops at a time, add more ammonia, stirring and observing after each addition. When you see that the solution is starting to clear, slow the addition to one drop at a time, with stirring. The ammonia is dissolving the precipitate. There will only be one drop between being able to see a few remaining black flecks and total clearing. It is important to avoid excess ammonia. When the solution is clear, cover (I set a glass coffee cup saucer on top) and set aside at room temp.
Dissolve, cover, and hold at 43C. Turn the heat off the waterbath. Make sure the temperature is not above 43C. If it is, add a little ice water through the thermometer hole. (I keep a wash bottle in the refrigerator to cool down the waterbath if necessary. Temperature control is our friend.) Under red or dark amber safelight: Making sure you know which is which, have Parts B and C at the handy. Over 5 seconds time, with slow stirring, add Part B to Part A through a small funnel (0.5 cm outlet) held right above the gelatin mixture. Immediately add Part C in the same manner. Stir an additional 30 sec. Stop stirring. Pull the waterbath off the hot plate. Ripen the mixture without stirring for 15 minutes. Make sure the waterbath temperature stays between 40 and 43C. (Make a note of the temperature curve over the 15 minutes for future reference and recipe refinement.) Fluff the Part D gelatin with a plastic fork. Sprinkle/scrape it into the hot mix. Gently press in under the surface and give a gentle stir. Ripen with only two short stirs another 15 minutes. (A gentle stir and scrape from the bottom at 5 minutes and 10 minutes.) The heat should stay between 40 and 42C degrees. It may be necessary to slide the waterbath back onto the hot plate. Pour the melt into a ziploc sandwich bag resting in ice water. Seal the bag and refrigerate in a light proof container at least 4 hrs. (Note: This time period is an emulsion variable. Be consistent, or, keep a record of the interval between sessions.) Second Session: Preheat waterbath to 55C. Have a 400 ml beaker ready. Washing the gelatin: In the dark or under safelight, put the baggie of refrigerated silver gelatin in another lightproof container at room temperature and let warm a bit (approx. ½ hour). It will be too stiff to noodle otherwise. Bare in mind the time/temperature component of ripening. You don’t want the gelatin to get too warm or sit around too long or the sensitivity curve will become an unknown - at the worst to the point of fog. If the lump of gelatin is still too hard to squeeze through the ricer when you get started, you can tear off smaller pieces with your latex-gloved fingers, making very sure you don’t drop any. Have a large quantity of ice water available (tap water or filtered, depending on your water quality – distilled is not required and may even be detrimental). I fill a Coleman drink container with crushed ice from the corner market and keep it covered with tap water through the washing cycles. Set a jelly straining bag in a half gallon size Coleman cold thermos, turning the top of the bag over the edge of the thermos. Pull the drawstring securely and tie with a bow tie. Fill with ice water (strain out any pieces of ice). Set the open potato ricer bowl in the ice water in the thermos. Go to safelight. Open the baggie of gelatin and turn it out into the ricer bowl. Keeping the ricer holes under the ice water and inside the jelly strainer bag, squeeze out the threads/’noodles’. With a small rubber scraper or plastic spoon make sure all the gelatin gets into the bag. Pull the drawstring very tight and tie in a bow tie. Wrap the neck tightly with a rubber band. Drop the bag in the ice water and put the lid securely on the thermos. Over the next approximately 1 and a half hours, wash the noodles. (Note: I have checked the pH after each 5 minute change of water, and the pH lowering curves were identical from 10 to 7.8 for two separate trials. You need to get the pH between 7 and 8, but over-washing is to be avoided. I don’t think it is necessary to check the pH if a careful and consistent wash cycle is maintained.) Set a timer for 5 minutes, and agitate the thermos like you would a big cylindrical film development tank. This is much harder to describe than to do: Hold the thermos horizontally in front of you, one hand on the bottom and one hand on the lid. Tip back and forth with a quarter-clock rotation with each tilt. This is a gentle exercise; it just assures that the water is moving inside the container, but not beating up on the contents. After 5 minutes, open the thermos and pour off the old water. Remove the jelly bag and gently squeeze out some of the water. (The point isn’t to squeeze it completely dry). Strain in new ice water and repeat cycle. It takes me about 1-1/2 hours to make 12 water exchanges. For the first two 5-minutes washes, I agitated the entire time. After that I agitated one minute, let the thermos sit for three minutes and agitated again during the last minute. Since the thermos is light tight, this allows time for breaks and for staging the coating process. Just make sure to go back to safelight each time the thermos is opened. After the last wash, remove the bag and squeeze out as much water as possible. Open the bag and carefully turn the noodles into a 400 ml beaker (a wide mouth plastic canning funnel helps). Have a bowl of ice water and a gold mesh coffee filter at hand. Turn the bag inside out under the ice water and agitate gently to wash the noodles off the bag. Strain the wash water through the coffee filter and return the captured noodles to the beaker. Check the sides of the funnel and scrape down any noodles that have clung to the sides. (Note: don’t wash them down.) The point of all this is to get as many last pieces of silvered gelatin as possible. The gelatin/water balance is an important variable. Set the beaker in the 55C waterbath. Watch the temperature of the bath. It will immediately drop below 40C. Turn the heat up and place a separate thermometer in the gelatin. Gently stir the gelatin every 5 minutes until it hits 40C. (Stirring procedure: with the handle of a plastic spoon, slowly sweep clockwise around the inside of the beaker, make an X across the bottom, followed by another slow sweep around the sides, this time counterclockwise.) Drop in a magnetic stirring bar and add 2 drops Steigmann standard aurous ammonium thiocyanate solution 1 Slowly stir for 30 seconds. Complete digestion without stirring: Continue to bring up the temperature of the waterbath to 52C, keeping a watchful eye. (A small flashlight with the lens covered with red filter film is invaluable in the darkroom.) When it hits 50C, turn down the temperature so that the residual heat on the plate doesn’t cause the bath to over-shoot 52C. Have ice handy to drop into the waterbath if overshooting starts to happen. At the same time, watch the temperature of the gelatin. When it hits 52C, remove the beaker from the water bath. With a gentle stir every 5 minutes, watch the temperature until it hits 40C. When it does, stir in thoroughly 5 ml Everclear Strain the emulsion through a gold mesh coffee filter into another 400 ml beaker or similar wide-mouthed container. Ladle the emulsion onto prepared plates2 and coat.3 Turn out all the lights, check against light leaks, and then go away for 8-plus hours. A glass of wine or a good chocolate is highly recommended at this time. After at least 8 hours, go to safelight and check to be sure the plates are completely dry and then carefully remove the mylar backing. Load into holders or stack with interleaving in a light-tight paper safe.
Footnotes |
Additional Details on Tools and Materials
|
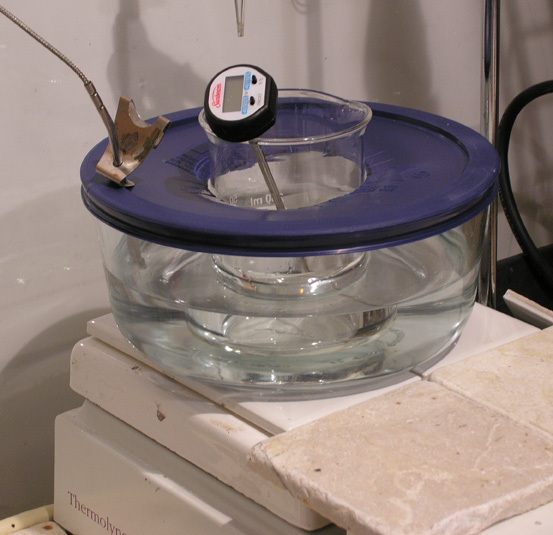
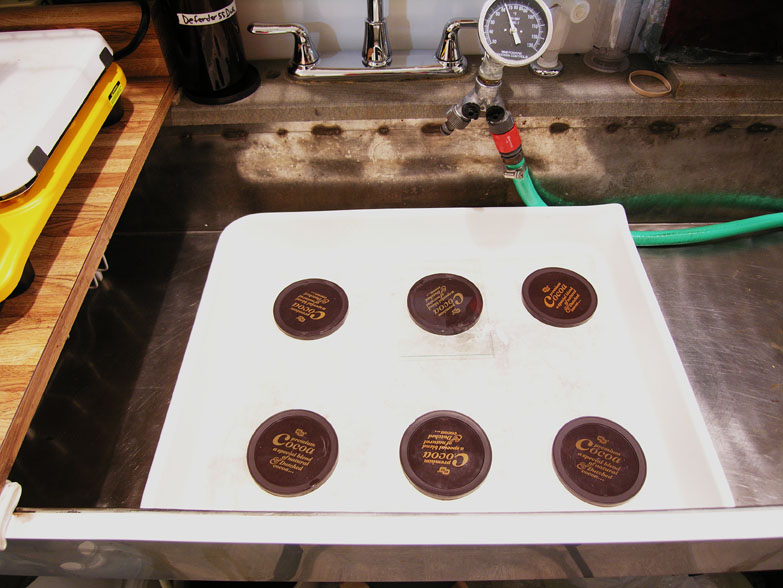
Hot running water is handy, but good ventilation is a must. Chemicals needed: Distilled water, gelatin, silver nitrate, ammonium bromide, potassium iodide, 28% ammonia, 1% gold chloride solution, ammonium thiocyanate, and Everclear or similar. Various beakers, funnels and strainers, plastic spoons and forks, a set of graduated cylinders, latex gloves, and eye protection (I count on my regular eyeglasses for protection). A stainless steel (not zinc-coated) heavy duty potato ricer, a gold mesh coffee strainer, a light tight container for refrigerated emulsion storage, cloth jelly strainer bags, round Coleman thermos coolers, and mylar sheets. Tools: A countdown timer, an electronic scale to at least 0.1 g accuracy, a digital kitchen thermometer with a remote oven probe (Sunbeam makes a good one), solution thermometers that measure in C (unless you can make quick F to C calculations), a basic magnetic hot plate with stirring rod. Mine is a venerable, analog model without a feedback temperature probe. It works wonderfully with a generous waterbath set on a couple of tiles for additional temperature buffering. A waterbath is easily made from a covered Pyrex dish. Trace the bottom of the beaker on the lid. Cut a half inch in from the outline and then cut 3/4 inch long notches out from the circle around the hole, at 3/4 inches apart. A beaker fits in tightly and securely. Fill the bowl with water so that the water level comes to within a half inch of the lid when a beaker is in place. With a paper punch, make a hole in the lid for the probe from a digital thermometer attached to the wall at eye level and in an area illuminated by safelight. Not necessary, but certainly a convenience, is a digital hot plate. Mine was $225 from Cimarec. If I need to go straight to a different temperature, I have a second waterbath ready and holding. It is a FAR more accurate way to control temperature than a probe-controlled magnetic plate, at a fraction of the cost. Before I got the Cimarec, I used the base from a detachable-style slow cooker, temp-buffered with ceramic tiles. The only real disadvantage to that was it took a bit more time to set up. The advantage is the irresistible thrift store chic. Coating: You need some way to keep your glass plates at about 35C until coating. I set mine on one of the warm granite tiles I keep ready for paper coating, but a heating pad would probably work great. Immediately before coating, center the glass plates on plastic lids arranged in a dead-level tray. There will be a mess. The next time I do this, I will line the tray with wax paper. To return to the beginning of the recipe
|
| Previous | Emulsion Home | Next |