First Work with 8x10 Blade
October 30 - November 1,
2006
Finally back at it. The good
news is that the fall shows were good enough for me to afford an 8 x 10
coating blade.
I started back at the exact spot that
I left in emulsion recipe tweaking. Knowing myself and my memory, I
left notes and post-its all over my darkroom and desk. It worked.
I would have sworn I had forgotten everything I had figured out, but I
followed my bread crumbs and cooked up perfect emulsion. That says a
lot about the usability of the recipe and process. The fragmentation
and complexities of most photographers' lives require a lot from any
process. It must deliver the technical goods, yet be agreeable to
putting down and picking up again, without unacceptable loss of time or
materials.
Once again: Thanks to Ron
Mowrey for getting the ball rolling.
The 8 x 10 blade is in some ways
almost a different animal than the 4 x 5. I expected that it would
just be "more" (emulsion and paper). Because of its length, it is a
challenge to pull it evenly down the paper. (The 4x5 blade almost pulls
itself.) I haven't eliminated this uneven pull "chatter" at the
beginning of coating. That is hopefully just a matter of
practice (and I've only coated 12 sheets of paper so far). If not, it
will require a piece of paper considerably larger than 8 x 10 to contact
print an 8 x 10 inch negative. As it is, there is more than enough
good surface in the center of an 11(h) x 10(w) inch piece of paper for a 5 x
7 negative. For my current work space, this requires 11ml emulsion.
I started out with by calibrating the
blade with spark plug gappers (at 6 mil). This works great with the
smaller blade, but couldn't seem to produce an even flow-thru gap along the
length of the longer blade, so I decided to eyeball the calibration. I
loosened the set screws, and in good light, adjusted the blade so that it
showed the slightest and equal gap on each
side. Works wonderfully! It is possible my gap is a little big,
but I think I'll play with emulsion viscosity before I change it. That
leads into an issue that is obvious from a technical p.o.v. but makes
reporting ongoing research a challenge.
There are a multitude of overlapping
variables involved with the process. I am working right now with
Fabriano paper - just 'cause I love the stuff. It is only slightly
absorbent, not enough to cause problems with the smaller coated surface.
With the 11 x 9 inch coated surface, the paper swells- bowing and popping.
With the thicker emulsion layer, which I love for the dmax and gloss, the
emulsion can pool in the valleys. This is visible as a discoloration
after processing (at least with warm tone developer). So...I need to
set up a dichotic tree to evaluate the variables. Emulsion viscosity
(temp and/or gelatin concentration), sizing options, developer effect,
and others that will no doubt come to me at 3:00 in the morning.
Well, back to it.
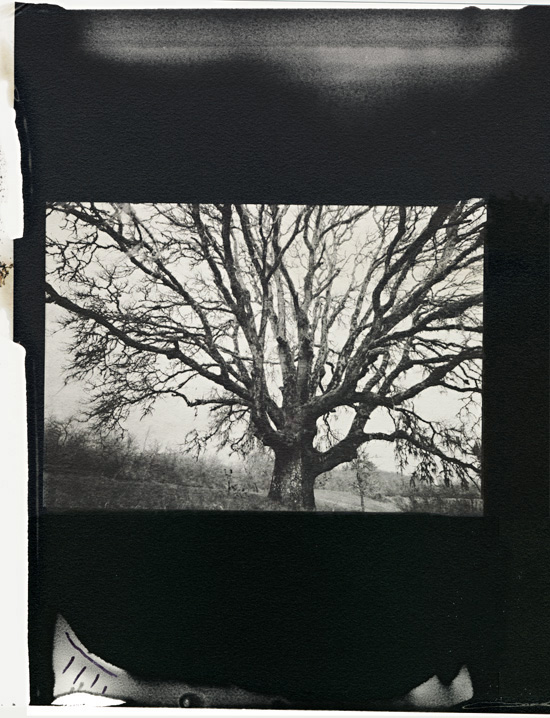
Full sheet (11 x 10 inch) missing the right edge in order to fit on
my scanner.
TMAX 5 x 7 original negative, XTOL developer
Note the "chatter" at the top and "out of emulsion" at the bottom.
I'm aiming for as little waste as possible. To evenly coat all the
way to the bottom, it is necessary to use enough excess to scrape off at
the end of the pull.
Developer: ZonalPro HQ Warm Tone, 1:10
Acetic acid stop
Plain hypo fix, two-bath.
10 ml selenium/liter archival wash aid |
|
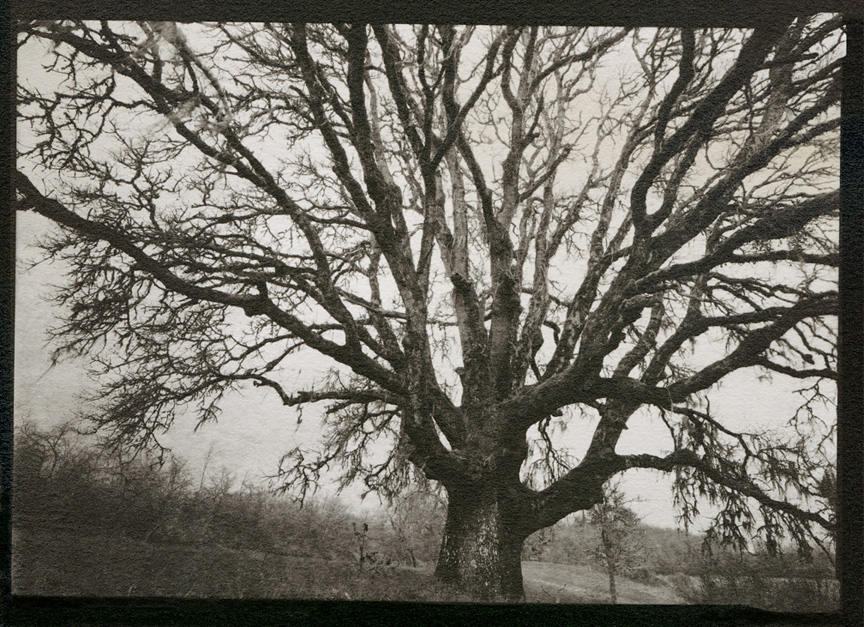
Image-only crop of above, fiddled with in Photoshop to try to convey
the exact color of the original. Close miss (at least on my
monitor) The color has a tad more of that not-quite purple brown of
selenium toning.
As always, any foggy appearance is a scanning artifact. I've
decided against the technique used by many pt/pd printers - to print the
image on commercial glossy paper, and use that for the scans. It's
a legitimate option if you're trying to convey an image. But for
me, this is about the process. My negatives of rocks,
trees, and running water are just fine, but at the end of day, they
really are just negatives of rocks and trees and running water. This
is about silky blacks and clear whites and all the grays in between - on
paper you want to stroke. |
|
November 2, 2006
Developed in Dektol 1:2, 2 min. Much
softer appearance to print (lower contrast and sharpness).
Toned one print in selenium (20 ml/lit archival wash).
There is a noticeable cooling.
Besides the color difference, the two prints point out the
variation within a batch. The top print shows some mottling through
the left edge. There's no indication that the emulsion is uneven, so
either the paper surface itself is affecting things, or emulsion defects
don't have to be visible to make their presence known. Playing with
sub coats and/or sizing should help with answers.
The bottom two pictures are crops of yesterday's HQ warm
tone and today's Dektol, both selenium toned. These are straight
scans, no adjustments or sharpening. The scanner exaggerated the color
difference, but the thing to note is how much softer the Dektol print is.
-1.jpg)
Dektol 1:2
Selenium: 2ml / liter archival wash |
|
Dektol, no toning |
|

200%
Dektol, selenium (20 ml / liter archival wash) |
|
200%
ZonalPro HQ Warmtone, selenium (10 ml / liter archival wash)
|
|
November
3, 2006
In the daylight this morning, looking
at two of the worst prints from both the HQ and Dektol sessions, I
realized how much info is in these "failures".
(Tech note: When I am preparing my
paper for coating, I punch a hole in the lower right hand corner. I
have allowed an inch salvage for handling on that edge, so that I know I
won't be getting finger prints of the coating surface even after I take off
the cotton gloves. This also makes handling in dim, red light much
less fraught.)
The idiosyncrasies of the scanner
will finally work to advantage. The emulsion defects are more obvious
than 'in person'. In the HQ print, you can see where the emulsion
pooled and cooled in a thicker layer. The HQ developed this out as
brown. Where the emulsion started running out at the end of the pull,
mottling is very evident. I forgot to check the placement of the
negative on the paper in the contact frame before I exposed. I drew
the arrows in the margin right after coating. In the reflection of the
safe light, thin patches are easy to see. They disappear as the
emulsion dries. On the other hand, pooling is only obvious after
the emulsion has started to dry. After the rest of the paper is dry
(about a half hour in my darkroom),
these areas are still glossy, and I either draw a circle around the small
areas or note in the margin that larger areas have pooled.
Dektol didn't discolor the area of
thicker emulsion. In the daylight, a slightly thinner area of emulsion
is visible at the top of the sheet. It's barely visible as you tip the print
in and out of the light, and was not visible right after coating, but
obviously the difference is significant enough to produce the mottling.
In the future, I will try to position the negative towards the bottom of the
paper.
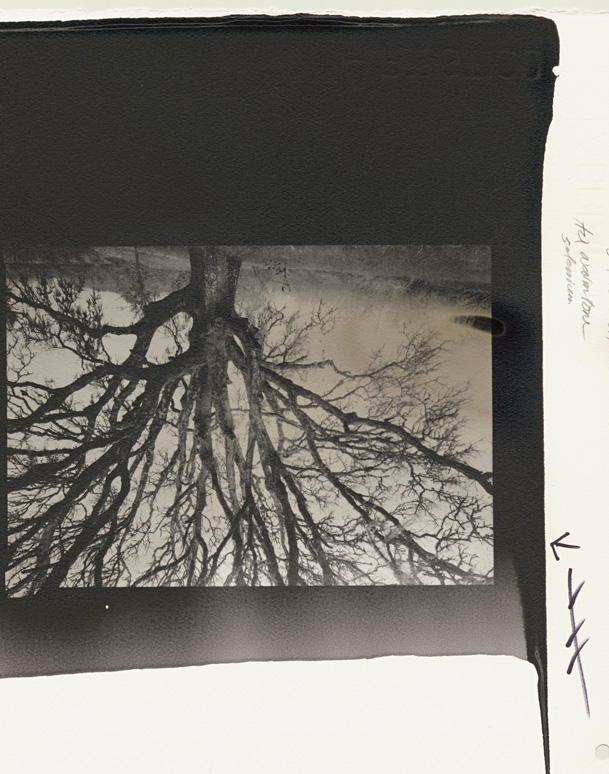
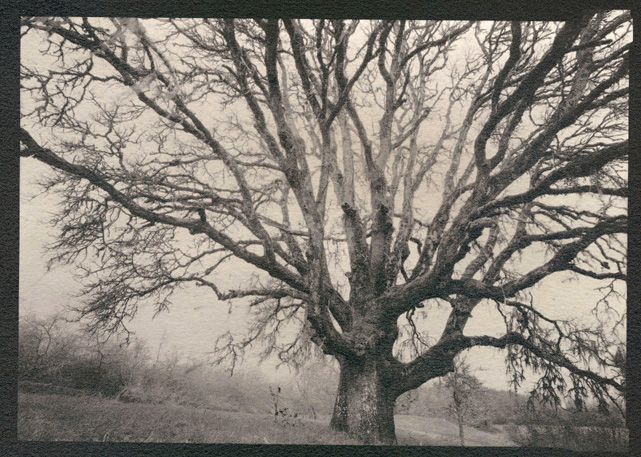
ZonalPro HQ Warmtone developer: (no metol - doesn't affect non-warm
tone commercial papers - I use it because I've become sensitive to metol),
selenium toned
The small, white spot in the lower right corner was smutz on the
contact frame glass. It shows as clean white, which is a good
indicator that the emulsion doesn't have a fogged base density.
(note: original wider than scanner)
| |
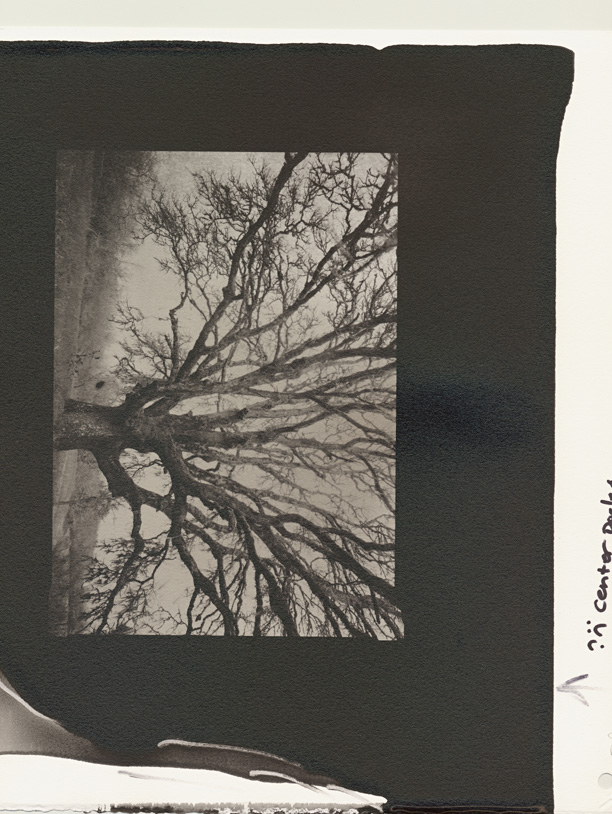
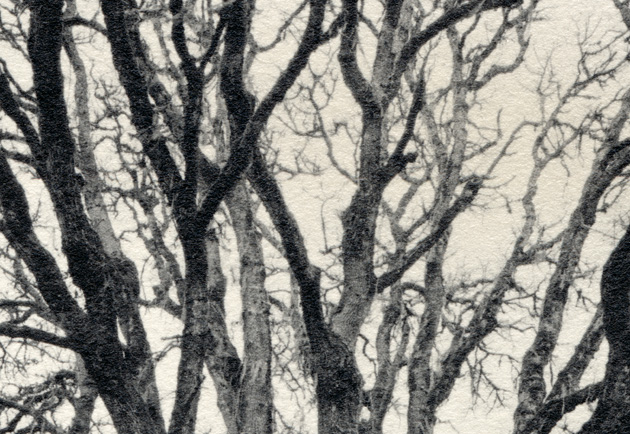
Dektol: The thicker emulsion pool is visible because it's so
much glosser, but there is no discoloration after development (center of
paper, right side). Mottling on the upper edge is visible even
though the thinner emulsion is just barely. The black dot next to
the left side of the main truck is probably a gel "slug" that got
through filtration.
| |
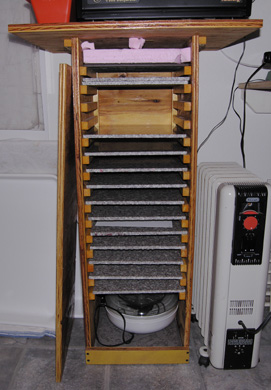
(Tech. note: Spouse and I built a simple tile warming cabinet from
scrap furniture grade plywood, insulated just on the top and bottom.
The slats hold single 12 in. sq. granite tiles at about 85F, temp maintained
by old fan-less food dehydrator - seems about right, but more important,
it's a consistent temperature that allows me to calibrate (more or less!)
the coating viscosity. I tape the paper on each tile and after coating
carefully set it aside and take a new, warm tile and paper to coat. I
don't touch them again until everything is dry. The "set aside" area
is just two painted boards set on the washing sink and along the opposite
wall on two cabinet doors propped open; very low tech, but easily set up and
taken down. The real advantage is that everything is clean, dry, and
warm at the start of coating, stays that way, and the process moves along
quickly.
The safelight shines on the wet paper in the dark and makes emulsion
imperfections very visible.)

Denise W Ross Photography