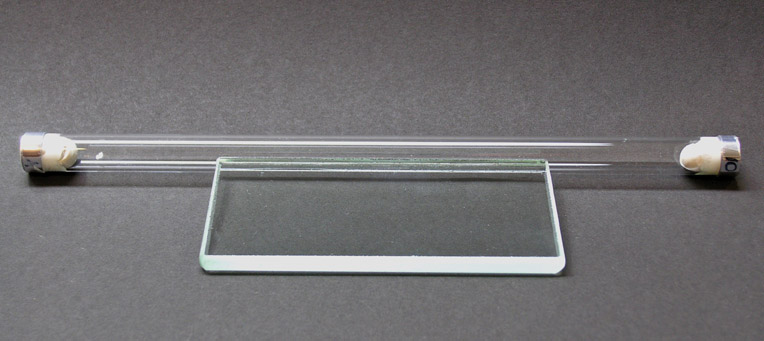
1) Glass coating rod / Corning 'Puddle Pusher'®
2) 3M polyester tape #850, 1/4in size
3) Wall stickum putty (the kind used to stick ID cards to the wall next to a photo hanging at a gallery).
Papers and Puddle Pushers
| Previous | Emulsion Home | Next |
|
All 140 lb. (300 gm/m2). Fabriano Artistico X-white HP, Fabriano Artistico Traditional HP, Rives BFK, Somerset Satin, Saunders Waterford, Hahneműhle Copperplate, Baryta glossy , Arches Watercolor HP, Arches Platine, and Crane's Platinotype (discontinued, I think). For detailed info on papers, see DanielSmith.com. I can't recommend them highly enough. With the exception of Copperplate, which needs a thicker emulsion coating to cover, all papers take the same Mowrey Blade settings (8 mil). For puddle pushing , all papers take 10 wraps of polyester tape , except the Baryta (8 wraps) and I haven't tried pudpushing the Copperplate. Results: My favorite paper continues to be Fabriano Artistico HP. It is suited to both blade coating and pudpushing. The texture is very close to Kodabromide N (from the 1952 Kodak Professional Handbook). With 'I ♥' there is the slight bas relief in the shadows seen on Mural Paper R. No other watercolor paper (that I've tried) duplicates closely the various textures of paper Kodak had once upon a time. Saunders Waterford comes closest to Opal Paper L. Baryta looks just like baryta. 'I ♥' coated on Glossy looks like Illustrators' Azo F. Arches, Saunders Waterford, and glossy baryta all work well and round out a choice of paper surfaces. I am not at all partial to rough papers. I will leave the explorations on those surfaces to others. (Note: I love the 4x5-size Mowrey emulsion coating blade. It is made for research, which is exactly what it was used for at Kodak. As I understand it, little machinist gnomes, working to the catacombs beneath Rochester, NY, made hundreds of these things, each machined to its own precise coating depth. True to Kodak form, the design was a deep, dark secret, and the blades have all been destroyed and their creators given lobotomies. Ron Mowrey has tried to recreate the blades with the added feature of adjustable coating thickness. He has succeeded with the small blade, but the 8x10 blade fails to keep the coating precision across the length - set high enough not to scrape the middle, the ends coat too thick.) |
Puddle Pushing 101
|
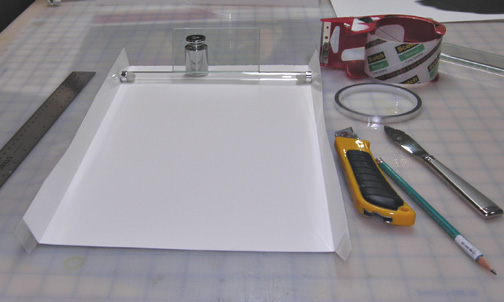
Materials: 1) Glass coating rod / Corning 'Puddle Pusher'® 2) 3M polyester tape #850, 1/4in size 3) Wall stickum putty (the kind used to stick ID cards to the wall next to a photo hanging at a gallery). |
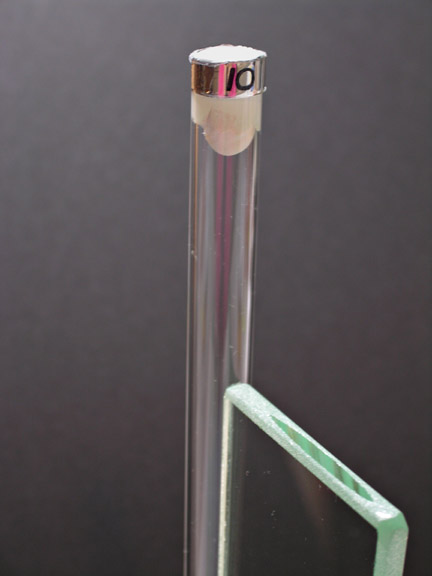 |
Wrap the tape in tight, smooth, even, overlapping wraps starting on the handle edge of the rod. In permanent marker, note the number of wraps. Each wrap increases the coating depth of the emulsion. Stuff the open ends of the glass rod with putty. The emulsion is a bug to get out of the glass rod otherwise. Push it in far enough that there is no drag as you pull the rod down the paper trough.
Note: All materials, including hands, must be kept impeccably clean at every step. |
 |
1) For a 9-inch rod (the size for '8x10 inch' prints), divide a 22x30 inch sheet of watercolor paper into four 11x15 inch pieces. From the front side of the paper, measure a border half the width of your tape. (15/16 inch for Scotch "Storage Tape"). Take the time to draw the line. It is important that the edge of the tape go down straight. Carefully keep the tape smooth on the inside surface. Wrap it up and over the back. It will be harder to keep the back side smooth, but that's not important. With a ruler and a butter knife, dent-score the paper along the edge of the tape and fold up a coating edge. Hold the PP at the edge and mark the other side in three places. Make the second edge. |
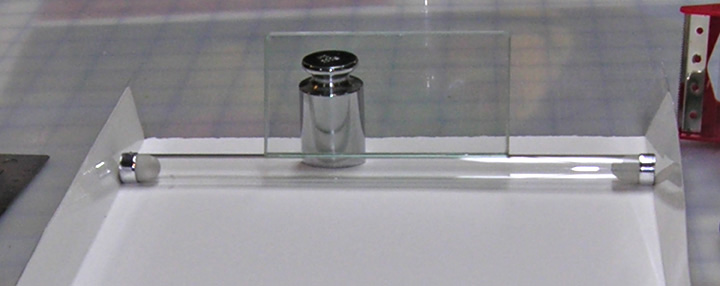 |
The Puddle Pusher fits exactly within the
paper trough, with just enough wiggle room to pull the rod smoothly down
the paper.
|
To Coat: Soak the paper in lukewarm water for about 15 minutes, drain a minute and stack vertically one on top of another (I slap them up onto a piece of acrylic propped at the back of the sink). Have a stack of 3/8 inch acrylic ready. (I use 14x20 inch sheets.) Under safelight, prepare emulsion. Place one sheet of acrylic on a level surface in the darkroom sink. Peel off one sheet of wet paper (the taped edges makes this easy). Center on the acrylic. Gently squeegee the paper down. Fold the edges back up. Prop the PP at the top of the sheet. Pour a measured line of emulsion in front of the blade (determining the amount will take a try or two - I use a plastic coffee measure [two tablespoons] for a coat big enough to spare for a 5x7 inch negative). Smoothly and evenly pull the puddle of emulsion down the sheet of paper. Press down just hard enough to keep contact between the tape guides and the paper. The coating speed will be obvious after a couple of tries. The idea is to keep the puddle flowing under the gap between the rod and the paper until the emulsion is spread. It makes matters much easier (i.e. cleaner and less fraught) if the paper is enough too long that the emulsion runs out before you get to the end of the paper. This keeps the acrylic clean and emulsion confined to the front side of the paper. With a permanent marker, note the edge of the coating. It is very visible while the emulsion is wet. After coating a sheet, clean the PP in a wash bucket of warm water and dry. This takes exactly long enough to give the freshly coated sheet a chance to firm a bit before you move it.
Move the coated paper on its acrylic to a level surface out of the way, and start a new coating on another piece of acrylic. I'm getting about 8 sheets of paper. By the time you have coated the last one, the emulsion on the first will no longer be fluid. Carefully peel the paper off the acrylic and hang (in the dark) to dry. Before you leave the darkroom (remember: still safelight) gather your coating tools and the acrylic sheets and take them out with you. Cleaning up everything in a timely manner is a good idea. Your mother was right (again!). (Note: I've never tried to dry the paper on the acrylic. It might work fine - or it might stick like a bad habit. If someone finds out, let me know.)
By the time the paper is dry, it will have a curl (more or less, depending on the paper), but that's not a problem with contact printing. As you take down the dry paper (still under safelight) cut the taped edges off. The easiest way is to place the paper face down on a clean, smooth paper cutter and fold the taped edge over the cutting side. This lets you cut the perfect edge with no coated surface waste. I store the paper in a black, plastic photo paper bag with a sheet of acrylic on top. The paper quickly flattens out enough to make it easy to handle.
|
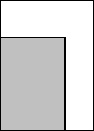
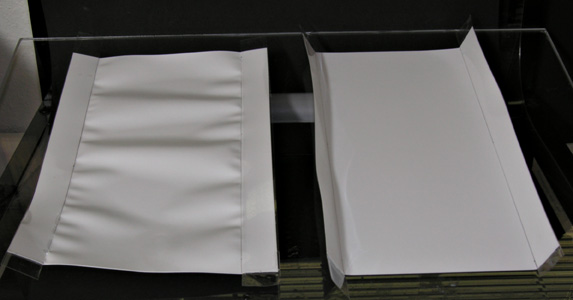
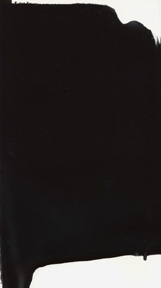
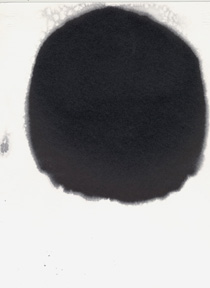
A Big-Ol' Important Thing: Grain counts. Not all papers equally, but to some extent, for all of them: Grain counts. Two pieces of glossy baryta paper from the same 11x14 inch size package, both prepared as emulsion troughs for puddle pusher coating and soaked for a few minutes. The one on the right is half a sheet cut across the short dimension: 7 x 11 inches (i.e. One 11x14 inch sheet becomes two 11x7 inch pieces.) The piece on the left is a 11x7 inch section cut from an 11x14 sheet, with the grain running opposite to the right hand piece. The grain/swelling direction is evident. One sheet will lay flat almost without needing to be squeegee'ed, the other couldn't be flattened with a steam roller. Therefore, if one wishes to coat an 11x14 sheet of baryta (at least the version sold by Photographers' Formulary) you must cut from a piece large enough to get the grain right.
|
||||
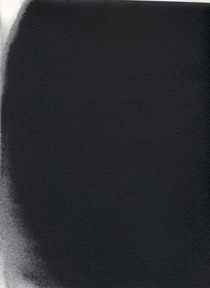
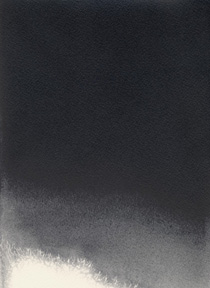
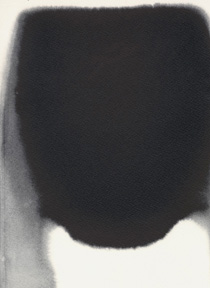
Puddle Pushed Paper Samples
Straight flatbed scans. No sharpening or spotting. From left to
right: Baryta 5.23 x 9.35 inches (coated with a 5in PP), Platinotype (8.5 x
11.68in), the maximum size for my scanner, Rives BFK (8.5 x 11.68 in), Saunders
Waterford (8.5 x 11.68), Somerset Satin (8.5 x 11.68). Any uneven
appearance is an artifact of the tooth of the paper. All the sheets look
great in their areas of max black. The baryta may coat better with the PP
than it does with a Mowrey blade.
 |
 |
 |
 |
 |
| Previous | Emulsion Home | Next |