An Overview:
Updated As I Go Along
HANDCRAFTED SILVER GELATIN EMULSION
I. Notes from the Pulpit
Sometimes I feel like "Luddite Meets the Jetsons". Having long ago
committed to memory Ansel Adams's Basic Photo series, I now
alternate between Photography with Emulsions, written by William de
Wiveleslie Abney in 1885, and the postings on
hybridphoto.com. The energy and creativity pulsing from photography
right now is almost a tangible object. Quite marvelous.
In my opinion (totally unbiased, of course), one the most important things
going on is the recognition that, virtually
overnight, silver gelatin printing has become a "traditional process". This is
often treated as a calamity rather than a
tremendous creative opportunity. Silver paper has been dying the death
of a thousand paper cuts (good one, huh?)
I believe with evangelical fervor that those of us who know what great b&w
looks like and how the 'old' stuff handled
need to be the bridge between generations. Don't snort, but I see the
very real possibility that b&w silver gelatin aesthetics
will soon be judged against b&w digital. Today, at least, the digital
Holy Grail is The Weston Print.
Tomorrow, critics will look at an Adams, Weston, or Lange and see something
that need torquing up (never
mind the odd branch or wrinkle that "doesn't work" and should be removed).
In my ideal world each approach will be judged by its own standards, just as
we accept that platinum isn't supposed to look
like albumen. Homemade emulsion is NOT about copying a commercial
standard. The point is not to make "Azo". The point, if you
will, is to have ultimate creative control over our own personal vision.
Even if the commercial papers hadn't started
disappearing, that would still be worth the effort. Enough pulpit.
II. Creative Control
What first must be said is that this is a life's work. In many respects
we're starting over. Many of the early formulas and
secrets have gone to the grave. Many of the materials and tools have
changed. This just means that the potential pathways are
infinite. Papers: weight, texture, color. Emulsions: warm, cold,
contrast. Developers: Every speed and color temperature
visible to the eye. Toning: Don't get me started. Tim Rudman's
"Toning Book" will become the icon it deserves to
be. As will "The Darkroom Cookbook", by Stephen Anchell.
Emulsion making is easy. Not Hamburger Helper easy, but no more
difficult than making homemade mayonnaise to spread on homemade
bread. Put your mind in the place where you think of it as learning a
recipe from a cooking show on television. In our case, the kitchen is
the traditional home darkroom with great ventilation:
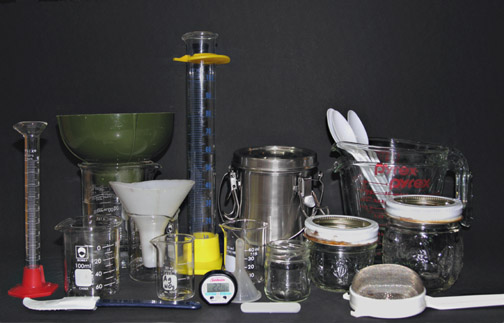
First: Equipment: Much can be assembled from your kitchen.
Canning jars, baby food jars, digital thermometers, funnels, tea strainers,
Pyrex measuring cups, plastic spoons.
Some equipment must come from a photo supply house (my favorite is
Photographers' Formulary: http://www.photoformulary.com)
graduated cylinders (10 ml and 100 ml are important; a liter is handy) Glass
beakers: I use 30,50,100,250,
and 400 ml sizes and chemicals. The chemicals in the emulsion I am
currently working with (designated in my notes as " I
♥ Emulsion , #1" (Yes, I know. I'm
such a girl.) are photographic gelatin, silver nitrate, sodium
chloride, potassium bromide, citric acid, Photoflo 600, glyoxal, potassium
iodide, and Everclear grain alcohol.
From an art supply (my favorite is Daniel Smith in Seattle: http://www.danielsmith.com)
watercolor paper, canisters for lightproof storage of emulsion (sold as 20 oz.
Stainless Steel Airtight Brush Washer), and misc. pigments.
Ebay and science supply houses for lab equipment.
Magnetic stirring hot plate, temperature-controlled hot plate, glass buret,
stand and clamp.
The folks at http://www.sciencecompany.com are great to work with.
Home Depot.
godblessum. How could anything get started without Home Depot and Robnette's
Hardware (operating in Corvallis,
Oregon, since about the time the first steamboat headed up the Willamette
River). I found closeout 12in granite tiles
at Home Depot for $4 each.
III. Getting To It.
 |
Required: basic lab/darkroom skills and the acceptance that care and
repeatability are important. Tools: Safelight, digital
thermometer, tempering water bath on magnetic stirring hot plate (I found my
venerable darling on ebay for $149). Glass buret
with stand, hot plate (I was using the base of a slow cooker before I got a
"real" one for Christmas). A reliable electronic
lab scale, glassware, plastic injection syringes (Monoject 412). Small
flashlight shielded with red safety film.
|
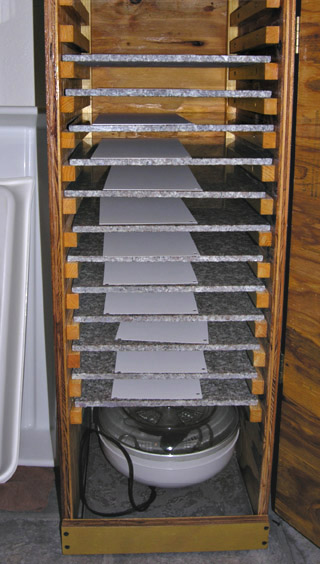 |
A smooth, consistent workflow goes a long way toward making the process
enjoyable and waste-free. I set paper out (with the 4x5
inch blade, I cut paper 6 x 12 inches) on warm tiles stacked in a homemade
cabinet. The warmer is an old fanless food dryer. A hole
punched in the lower right-hand corner helps me keep the paper oriented
correctly at each step. I pre-tear little pieces of
adhesive tape and line them up on the clothesline above the sink, ready to go.
|
 |
Emulsion making and paper coating is easy to learn by watching; it is very
difficult to describe in less than a gazillion words.
I plan on teaching the process soon. Right now, Ron Mowrey teaches a wonderful
survey workshop covering the history and basic
chemistry techniques of both paper and film emulsions. His next workshop is in
June at the Photographers' Formulary.
http://www.photoformulary.com
My recipes and techniques are significantly different from Ron's. But, that's the point
worth celebrating. This is a flexible process, accessible to an artist's individual
creative stamp.
|
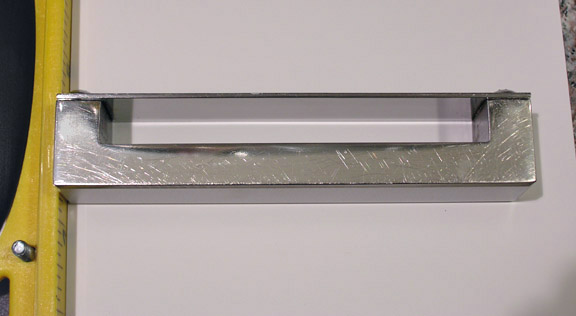 |
4 X 5 Emulsion coating blade
|
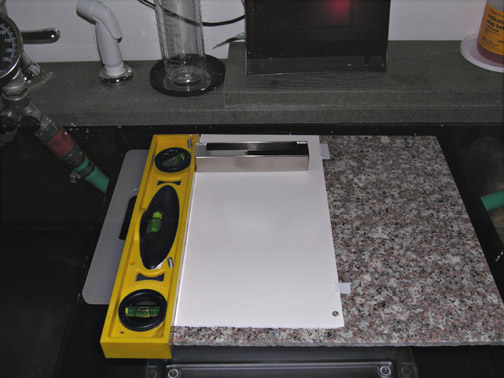
Required for paper coating: an absolutely flat, level surface with a straight edge on one side. A three-way level does double duty.
More illustrations
The granite can be warmed a bit ahead of time. Paper is pushed up along the level
on one side and taped on the opposite side out of the
path of the coating blade. This allows the paper to curl freely along its
longitudinal axis after it is wet by the emulsion. If
the paper is oriented against its grain (not all papers are equally sensitive
to grain swelling) the paper will washboard
instead of cupping up and the emulsion will dry unevenly. The well of the
blade is filled with a measured amount of emulsion
and quickly and evenly pulled down the length of the paper. The emulsion flows
out a small adjustable gap.
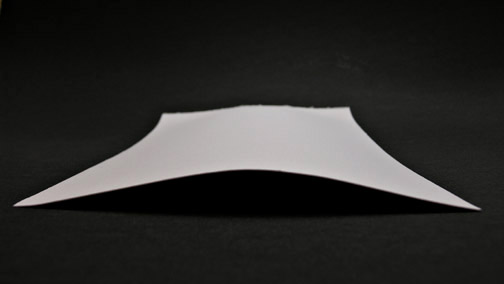 |
Longitudinal paper curl: cupping along the grain of watercolor paper. This piece of
paper was cut 6x12 inches, with the long dimension oriented along the grain.
|
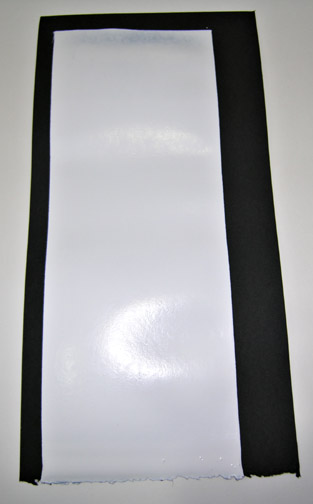 |
By way of a visible demonstration:
white acrylic gesso on black watercolor paper. Note that I used a piece of
scrap black paper, without
considering the grain. The washboarding is evident. If the paper had been
coated along the grain, the reflection from the flash would have
been a line down the center of the paper.
|
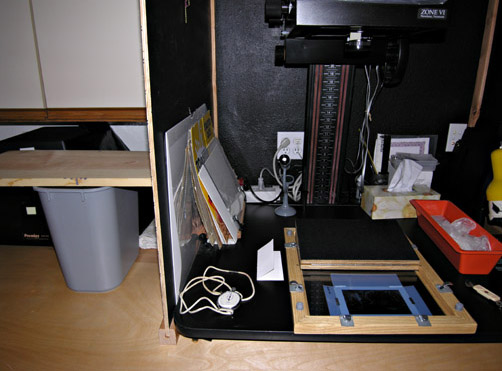
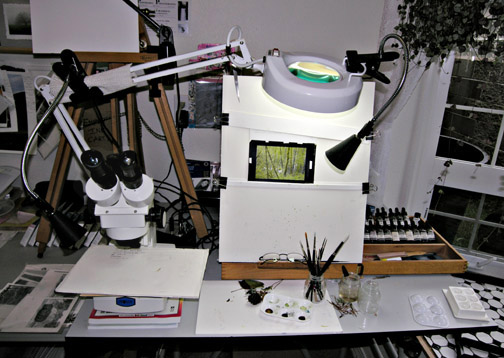
Printing couldn't be easier. The early photographers were onto something -
contact printing. Sandwich the paper with a negative in a contact
printing frame and stick it under a light bulb. I use a 65-watt Phillips
indoor flood set 4 ft from the paper. The board on a
wastepaper can is the "printing table". I time with a stopwatch. I'm using
digital negatives sized to 3.5 inches tall. These fit
on the emulsion with room enough to spare to use the beautiful black emulsion
as a border. Celebrate the process.
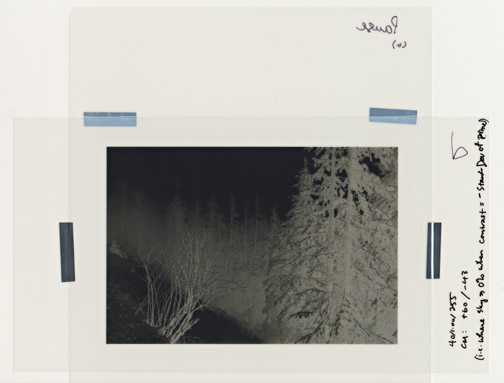
My own, idiosyncratic technique. I'm sure any standard negative-generating
strategy would produce a suitable digital negative.
Once the paper has dried (on the granite, in the dark) and is in a paper
safe, I treat it as I would any commercial black and white
paper. The processing steps, developer to drying, are those learned in
Photography 101. One of the most exciting creative
controls is the response the emulsion shows to different developers. I've just
scratched the surface. Right now, I'm in
love with Defender 55-D with 2% benzotraizole in the working solution,
followed by a light selenium toning. (See Steve
Anchell's book - The Darkroom Cookbook-Second Edition, Focal Press,
2000).
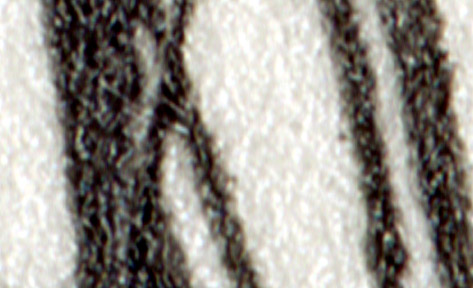 |
3000%
detail. The white lines showing in the dark areas are reflections off
the emulsion-coated grain of the paper. The emulsion dries to a
semi-gloss/satin surface that hugs the microscopic hills and valleys of the
watercolor paper. The effect is almost bas relief and quite wonderful.
|
IV. Post-printing
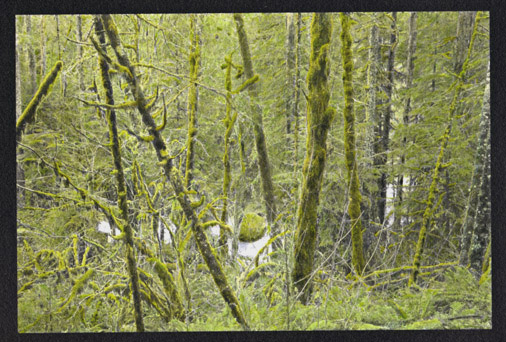
Regarding handcoloring: Of course, I couldn't resist. The emulsion, at
least on Fabriano Artistico paper, takes
photographic dyes beautifully. I haven't tried oils or pencils.
V. Toning
One of the aspects of this I'm most excited about is how well handcrafted emulsion
takes to toning. Again - surface just scratched. I
intend to live inside Tim Rudman's book, (The Photographer's Toning Book,
the Definitive Guide, Amphoto Books, 2003) for the next couple of months.
What I currently know is that ♥#1 on Fabriano
Artistico watercolor paper looks like it takes beautifully to split-toning
techniques.
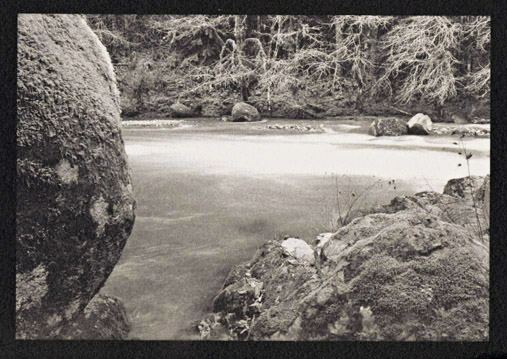 |
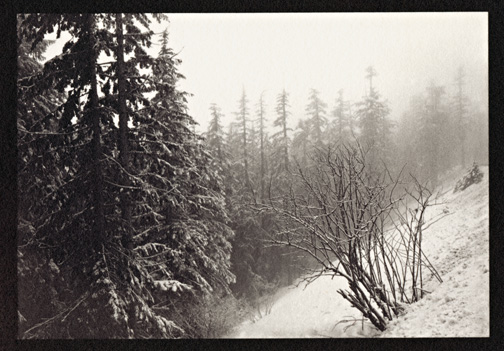
Processing steps, in order: Defender 55-D, dilute acetic acid, two-bath (non-hardening)
hypo, 2% Rapid Selenium in archival washing aid, running water wash.
|
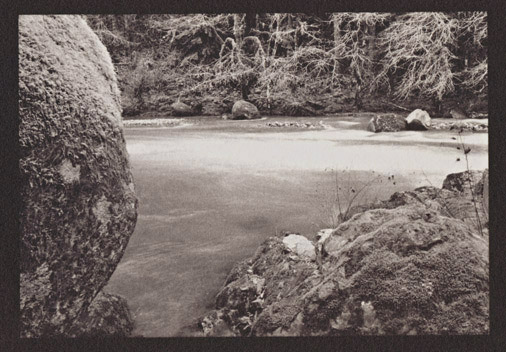 |
Processing steps, in order: Defender 55-D, dilute acetic acid, two-bath
(non-hardening) hypo, 20% Kodalk, 10% selenium, water rinse, washing aid,
running water wash.
|
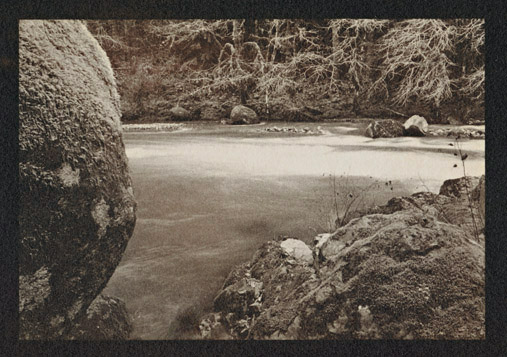 |
Processing steps, in order: Defender 55-D, dilute acetic acid, two-bath (non-hardening)
hypo, 20% Kodalk, 10% selenium, 1% gold chloride, water rinse, washing aid,
running water wash.
|
Denise W Ross Photography